
How to Use AI for Supabase Operations - Step-by-Step Tutorial
Supercharge your OnSpace builds with Supabase's all-in-one backend platform, creating dynamic full-stack applications with enterprise-grade capabilities.
With OnSpace's Supabase integration, you can build complete full-stack applications through simple conversations. Instead of juggling multiple tools and platforms, describe what you want to build, and OnSpace handles both the user interface and backend database automatically.
Whether you're a complete beginner or an experienced developer, this integration eliminates the usual complexity of coordinating frontend and backend development. No coding experience required – just tell OnSpace what your app should do, and it creates everything you need.
Overview
Supabase is like having a complete backend team at your fingertips. It provides everything modern apps need: secure databases, user accounts, file storage, and real-time updates. When combined with OnSpace, you get all these powerful features without writing complex backend code or managing servers—just natural conversation.
PostgreSQL Database Foundation
Store any type of data your app needs with automatic database setup. Just describe what information you want to save (like user profiles, product reviews, or order history), and OnSpace creates all the database tables for you.
Secure User Management
Add user accounts to your app with secure login systems. Choose from email/password, Google sign-in, GitHub, or other social logins. OnSpace handles all the security and setup automatically.
Cloud File Management
Let users upload photos, documents, and other files with built-in cloud storage. Perfect for profile pictures, document sharing, or any app that needs file management capabilities.
Live Data Synchronization
Create apps that update instantly for all users. Perfect for chat apps, live dashboards, collaborative tools, or any feature where users need to see changes immediately without refreshing the page.
Serverless Backend Functions
Add advanced features like automated emails, payment processing, AI features, and connections to other services. OnSpace can help you set up these powerful backend functions when your app needs them.
Why Choose OnSpace's Supabase Integration?
Traditional app development requires separate teams for frontend (what users see) and backend (databases, servers). With OnSpace and Supabase, one conversation handles both. You describe your app idea, and OnSpace builds the complete solution.
Example in action:
For example: Say "I want customers to leave reviews with star ratings" and OnSpace creates the review form, sets up the database to store ratings and comments, and connects everything together. You get a complete working feature from one simple request.
Setup Guide: Connecting Your OnSpace Project
Prerequisites
- Active Supabase account (free tier available)
- OnSpace project ready for integration
1 Supabase Account Setup
First, you'll need a Supabase account. Don't worry – it's free to start and only takes a few minutes to set up. Head over to supabase.com to create your account.
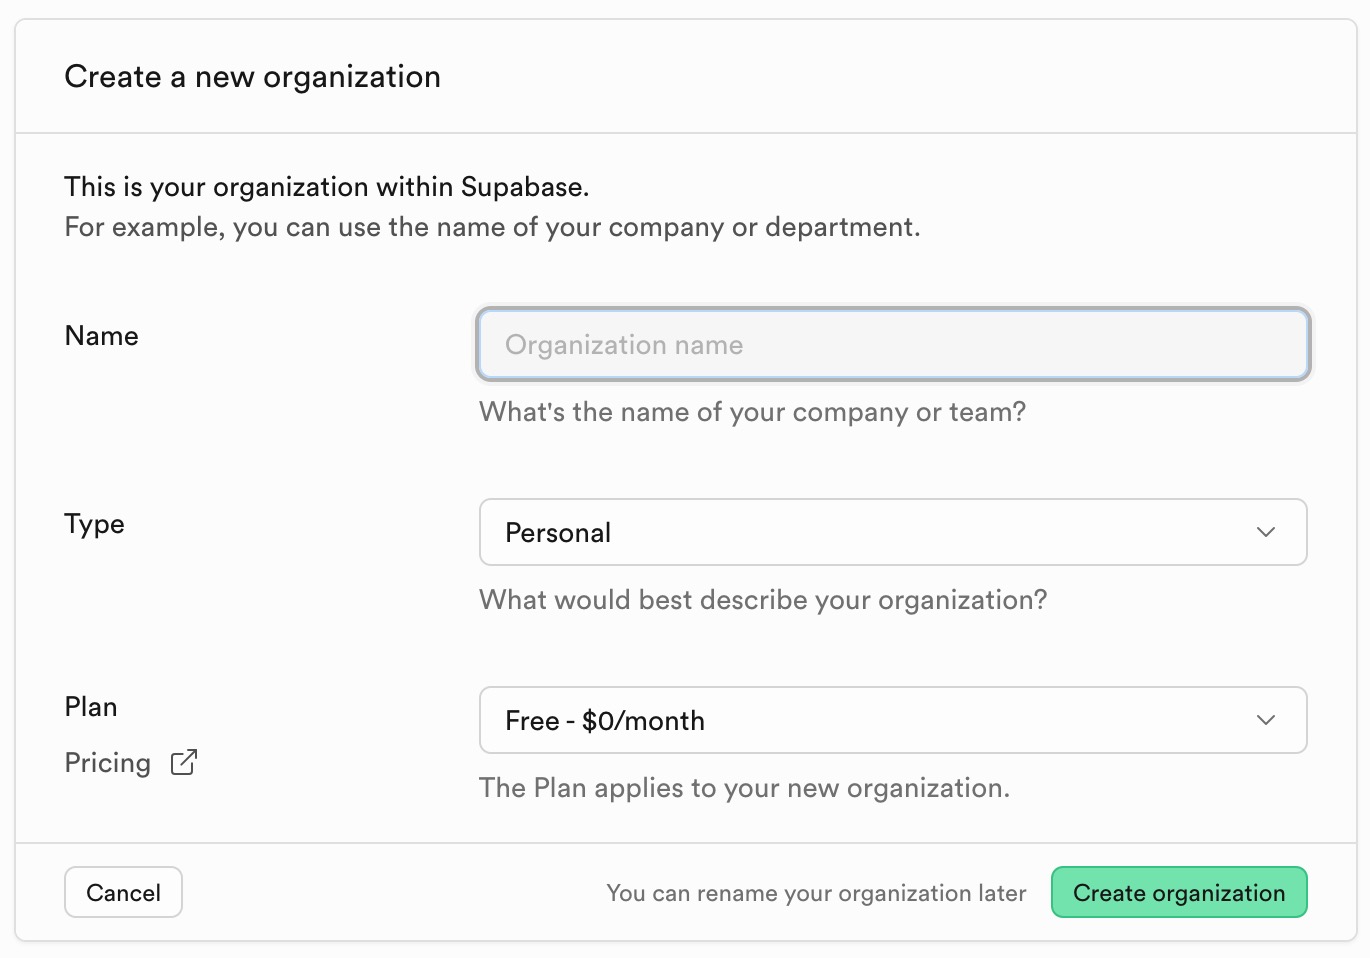
Create a new organization (during signup)
When creating your new Supabase account, you'll be asked to set up an organization during the signup process. This is just a container for your projects – you can name it anything you like. Free tier users can create up to 3 projects per organization, with each project providing isolated backend services including databases, edge functions, authentication, and storage.
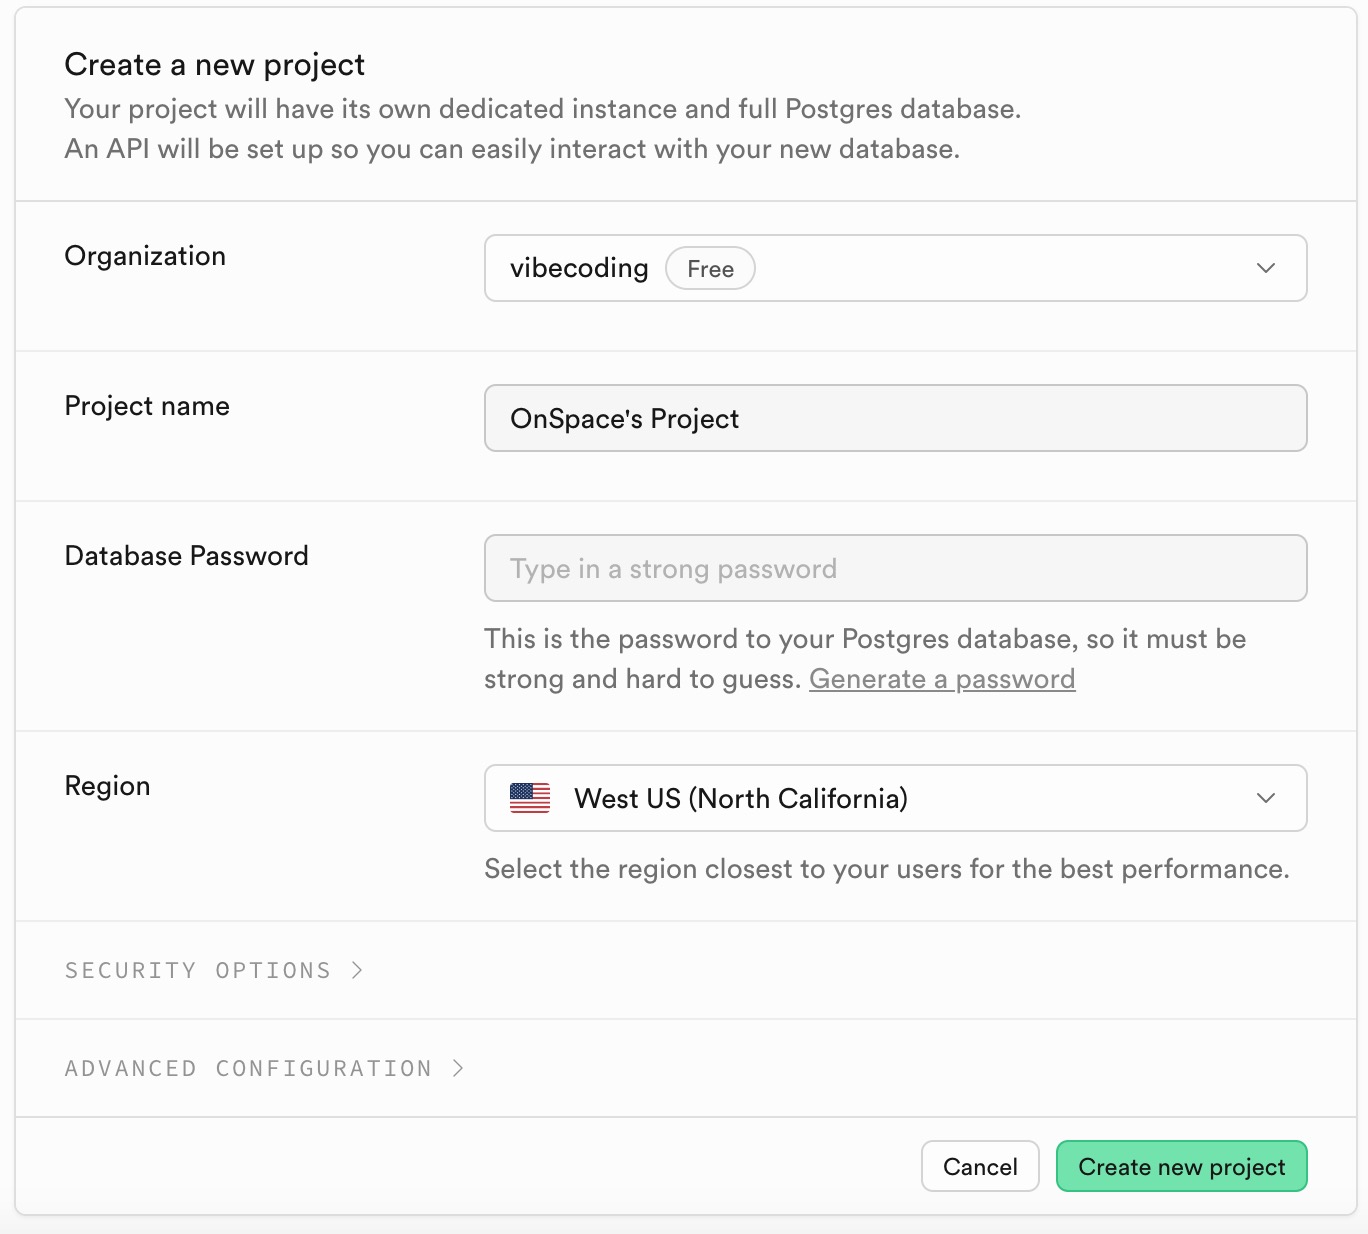
Create a new project
Each project provides a complete isolated backend environment with its own database, authentication system, storage, and edge functions. This means you can use different projects for different apps or environments (like development, staging, and production).
2 OnSpace Integration
Initialize Connection
In your OnSpace project, look for the Supabase logo in the top-right corner. Click it and select Connect Supabase to start the integration process.

Account Authorization
You'll be taken to Supabase to log in and give OnSpace permission to connect to your account. This is secure and lets OnSpace automatically configure your database.
Project Selection
Select which Supabase project you want to use for your OnSpace app. If this is your first time, you can create a new project right here.

Configuration Completion
Almost done! Refresh your OnSpace project page, click the Supabase icon again, and select your project from the dropdown menu. When you see the green "Connected" status, you're all set to start building with Supabase.

🎉 Integration Complete!
Perfect! Your OnSpace project now has access to powerful database features, user authentication, file storage, and real-time updates. You're ready to build amazing apps with just conversations.
Next Steps: Your First Feature
Build Your First Login System
Now that your Supabase integration is complete, it's time to create your first powerful feature. User authentication is one of the most requested features, and with OnSpace + Supabase, it's incredibly simple to implement.
Watch this step-by-step video tutorial to learn how to build a complete login system with email/password authentication, secure user sessions, and protected pages – all through natural conversation with OnSpace AI.
Watch Login TutorialSupabase Login Tutorial
Learn how to implement secure user authentication using OnSpace AI and Supabase integration.